
本記事ではGSAPを使って複数の要素を連動させるアニメーションについて解説します。
GSAPで複数の要素を連動さるアニメーションにはTimelineというメソッドを使います。
Timelineを使いこなせるようになると、少し下の動画のようにサイトにリッチな演出が実装できるようなります
この記事はUdemyの「Master JavaScript Animations with GreenSock」をもとに執筆しています。
▼2時間30分の講座でGSAPの基本から応用までカバーされており、1日でアニメーションが自由に作れるようになります。▼
この記事では上記の教材なしでもアニメーションの実装はできますが、Udemyをメインで使い、サポート教材としてこのブログを使うことをお勧めします。
本記事を理解することで下記のようなアニメーションを実装することができます。(※Udemy講座の内容になります)
前回の記事でGSAPの基本であるTweenについて解説しました。
あわせて読みたい
-

-
【GSAP 2/4】基本的なアニメーションと連続した動きの実装ー初めてのTween作成編
続きを見る
目次
では解説していきます!
まずは準備
実装を開始する前にHTML、CSS、JavaScriptをそれぞれ準備しましょう。
ファイル構成は全ファイルが下記のように同一の階層になるようにします。
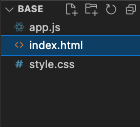
ではHTMLとCSSそれぞれ下記のコードをコピペしてください。(JavaScriptはファイルだけ作っておいてください)
HTML
<!DOCTYPE html>
<html lang="ja">
  <head>
    <meta charset="UTF-8" />
    <meta name="viewport" content="width=device-width, initial-scale=1.0" />
    <title>GSAP</title>
    <link rel="stylesheet" href="style.css" />
  </head>
  <body>
    <div class="container">
      <div class="square square1"></div>
      <div class="square square2"></div>
      <div class="square square3"></div>
      <div class="square square4"></div>
      <div class="square square5"></div>
    </div>
    <script src="https://cdnjs.cloudflare.com/ajax/libs/gsap/3.11.4/gsap.min.js"></script>
    <script src="app.js"></script>
  </body>
</html>
17行目にGSAPをCDNで読み込んでいいます。
CDNリンクの取得方法は1つ前の記事を確認してください🙇♂️
CSS
.container {
  display: flex;
  justify-content: space-around;
  width: 100%;
  margin-top: 100px;
}
.square {
  width: 50px;
  height: 50px;
  background-color: green;
}
下図のような表示になると思います。

これで準備が整いました。
Timelineとは?
GSAPで使うTimelineは複数の要素やアニメーションのタイミングをコントロールするためのツールです。
Timelineを使わずに連続したアニメーションをdurationとdelayを使って作成することもできるのですが、かなり手間でメンテナンス性も低くなります。
例えば、下記のようにすれば連続した動きを実装できます。
const square1 = document.querySelector('.square1');
gsap.to(square1, { x: 100, duration: 1 });
gsap.to(square1, { y: 100, duration: 1, delay: 1 });
gsap.to(square1, { x: 0, duration: 1, delay: 2 });
gsap.to(square1, { y: 0, duration: 1, delay: 3 });
これは1秒ごとに一番左の四角が移動し、最終的に元の位置に戻るというアニメーションです。
しかし、この連続したアニメーションはduration(アニメーション時間)が1秒だから成立します。
ここで2行目のdurationの値を2に変更すると以降のdelayの値も変更しなければなりません。
これがメンテナンス性が低いということです。
一方でTimelineは1つのアニメーションが完了したら、自動的に次のアニメーションに移るという仕組みです。
したがって、前後のduration(アニメーション時間)やそれに伴ってのdelay(アニメーション発動遅延)を気にする必要がありません。
実際にはこのように書きます。
const square1 = document.querySelector('.square1');

const TL = gsap.timeline();
TL.to(square1, { x: 100, duration: 1 })
  .to(square1, { y: 100, duration: 1 })
  .to(square1, { x: 0, duration: 1 })
  .to(square1, { y: 0, duration: 1 });
上から順番にアニメーションの移動が行われるので、delayの記述が不要になりました。
durationの値を変えても、途切れることなく連続した動きになるので、いろんな値を入れてみてください。
これがTimelineの概要となります。
これからさらに詳しくみていきたいと思います。
Timelineの基本的な使い方
Timelineは基本的にまず変数を宣言します。
const TL = gsap.timeline();その後は、動かしたい順に上から並べていきます。
const TL = gsap.timeline();
TL.to(square1, { x: 100, duration: 1 })
  .to(square1, { y: 100, duration: 1 })
  .to(square1, { x: 0, duration: 1 })
  .to(square1, { y: 0, duration: 1 });
GSAPの慣習的に上から順番に並べているように記述していますが、元はそれぞれ繋がっているだけです。
元々は下記のようなコードです。
const TL = gsap.timeline();
TL.to(square1, { x: 100, duration: 1 }).to(square1, { y: 100, duration: 1 }).to(square1, { x: 0, duration: 1 }).to(square1, { y: 0, duration: 1 });
この例では「.to」しか使っていませんが、もちろん「.from」も使用可能です。
Timelineの基本的な使い方はこれだけです!
各アニメーション発動タイミングは調整できる
Timelineは複数の要素が連続するアニメーションをコントロールするのにとても役立ちます。
ここからはTImelineでのアニメーション発動タイミングを調整する方法を解説します。
1つ前のアニメーションを基準にタイミングを調整する
今までお見せしたものは一つのアニメーションが終わったら次のアニメーションに移るという内容でしたが、次のアニメーションを一つ前のアニメーションが終わる0.5秒前に発動させることも可能です。
const square1 = document.querySelector('.square1');
const square2 = document.querySelector('.square2');
const square3 = document.querySelector('.square3');
const square4 = document.querySelector('.square4');
const square5 = document.querySelector('.square5');

const TL = gsap.timeline();
TL.to(square1, { x: 100, duration: 1 })
  .to(square2, { x: 100, duration: 1 }, '-=0.5')
  .to(square3, { x: 100, duration: 1 }, '-=0.5')
  .to(square4, { x: 100, duration: 1 }, '-=0.5')
  .to(square5, { x: 100, duration: 1 }, '-=0.5');
このようにアニメーション内容の後に、「’-=0.5’」を付けることで各アニメーションの一つ前のアニメーションが終わる0.5秒前に発動するようになります。
「'+=0.5'」と書けば一つ前のアニメーションが終わってから0.5秒後に発動ということになります。
前のアニメーションでタイミングを調整する別の方法として不等号(「<」や「>」)も使用できます。
・< :前のアニメーションがスタートした時
・>:前のアニメーションが終了した時
const square1 = document.querySelector('.square1');
const square2 = document.querySelector('.square2');
const square3 = document.querySelector('.square3');
const square4 = document.querySelector('.square4');
const square5 = document.querySelector('.square5');

const TL = gsap.timeline();
TL.to(square1, { x: 100, duration: 1 })
  .to(square2, { x: 100, duration: 1 })
  .to(square3, { x: 100, duration: 1 }, '<')
  .to(square4, { x: 100, duration: 1 })
  .to(square5, { x: 100, duration: 1 });
このように記述すると「2つ目の四角がスタートした時に発動する」=「2つ目と同時に動く」ということになります。
上記の例の「<」を「>」に変えると2つ目の四角のアニメーションが終わった時に3つ目の四角が動き出すという意味なので記述があってもなくても同じになります。
この不等号には「>-=0.5」とも書けますが、これは「-=0.5」と同じに意味になります。
アニメーション開始時を基準にタイミングを調整する
ここではTimelineの発動時を基準としてある要素のアニメーションの発動タイミングを調整する方法をお教えします。
const square1 = document.querySelector('.square1');
const square2 = document.querySelector('.square2');
const square3 = document.querySelector('.square3');
const square4 = document.querySelector('.square4');
const square5 = document.querySelector('.square5');

const TL = gsap.timeline();
TL.to(square1, { x: 100, duration: 1 })
  .to(square2, { x: 100, duration: 1 })
  .to(square3, { x: 100, duration: 1 })
  .to(square4, { x: 100, duration: 1 })
  .to(square5, { x: 100, duration: 1 }, 3); //◀︎ 数字を入力する
このように記述をすることで、全体のアニメーションが開始して3秒たった後に一番最後の四角が動きます。
上記の実装だと、一つ前の4つ目の四角と同時に動きます。
各アニメーションに名前をつける
TImelineの中の各アニメーションには「ラベル」をつけることができます。
const square1 = document.querySelector('.square1');
const square2 = document.querySelector('.square2');
const square3 = document.querySelector('.square3');
const square4 = document.querySelector('.square4');
const square5 = document.querySelector('.square5');

const TL = gsap.timeline();
TL.to(square1, { x: 100, duration: 1 })
  .to(square2, { x: 100, duration: 1 })
  .to(square3, { x: 100, duration: 1 }, 'test')
  .to(square4, { x: 100, duration: 1 })
  .to(square5, { x: 100, duration: 1 }, 'test');
このように記述することで3つ目と5つ目の四角が同時に動き出します。
さらに、
const square1 = document.querySelector('.square1');
const square2 = document.querySelector('.square2');
const square3 = document.querySelector('.square3');
const square4 = document.querySelector('.square4');
const square5 = document.querySelector('.square5');

const TL = gsap.timeline();
TL.to(square1, { x: 100, duration: 1 })
  .to(square2, { x: 100, duration: 1 })
  .to(square3, { x: 100, duration: 1 }, 'test')
  .to(square4, { x: 100, duration: 1 })
  .to(square5, { x: 100, duration: 1 }, 'test-=0.5');
このように記述することで3つ目が動き出す0.5秒前に5つ目が動き出させることができます。
「ラベル」を設定することで、設定された要素が軸となり発動のタイミングを調整できるようになります。
今回の場合、10行目の「test」が基準となり12行目のアニメーションのタイミングを調整しています。
コールバックが使えるadd()
Timeline内ではコールバックを使用することができます。
これにより、「.to」や「.from」は移動やフェードイン・フェードアウトなどのアニメーションだけでなく、クラスを付与したり、スタイルを直接設定できるようになります。
その時に必要となるのがadd()です。
実際にソースを見てみましょう。
const square1 = document.querySelector('.square1');
const square2 = document.querySelector('.square2');
const square3 = document.querySelector('.square3');
const square4 = document.querySelector('.square4');
const square5 = document.querySelector('.square5');

const TL = gsap.timeline();
TL.to(square1, { x: 100, duration: 1 })
  .to(square2, { x: 100, duration: 1 })
  .add(() => square3.classList.add('test'))
  .to(square4, { x: 100, duration: 1 })
  .to(square5, { x: 100, duration: 1 });
このように記述することで2つ目の四角のアニメーションが完了後に3つ目の四角にクラス名「test」が付与されます。
アニメーション以外で特別な実装をしたい時はadd()を使いましょう。
任意の位置にラベルが設定できる addLabel()
少し前にアニメーションにラベルを設定できると解説しました。
TimelineにはaddLabel()があり、アニメーションにラベルをつけるのではなく任意の場所にラベルを設定することができます。
const square1 = document.querySelector('.square1');
const square2 = document.querySelector('.square2');
const square3 = document.querySelector('.square3');
const square4 = document.querySelector('.square4');
const square5 = document.querySelector('.square5');

const TL = gsap.timeline();
TL.to(square1, { x: 100, duration: 1 })
  .to(square2, { x: 100, duration: 1 })
  .to(square3, { x: 100, duration: 1 })
  .addLabel('testLabel')
  .to(square4, { x: 100, duration: 1 })
  .to(square5, { x: 100, duration: 1 }, 'testLabel+=0.5');
このようにTImelineの途中にラベルを設定することができます。
この実装では、3つ目の四角の移動が完了してから0.5秒後に5つ目の四角が動き出すという記述になっています。
まとめ
本記事では連続するアニメーションや、複数の要素が連動するアニメーションをコントロールする方法を解説しました。
次回はスクロールに合わせてアニメーションさせる方法について解説します!
では今回は以上です!
ほな🙌🏻
あわせて読みたい
-

-
【GSAP 4/4】ScrollTriggerでスクロールと連動したアニメーションの実装
続きを見る